環境構築手順まとめはこちらへ
Java + Tomcat + Eclipse + Seasar2 + MySQL 環境構築手順 その4
前回はSeasar2のサンプルアプリケーションを作成しました。
今回は、MySQLのインストールを行います。
MySQLのインストール
1.MySQLインストーラのダウンロード。
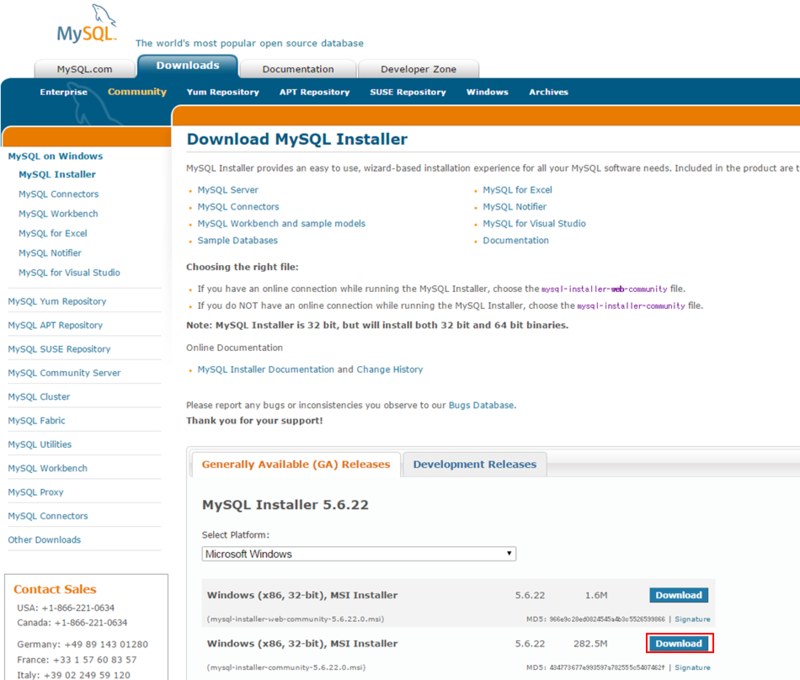
以下URLにアクセス。
http://dev.mysql.com/downloads/windows/installer/
下段の「Windows (x86, 32-bit), MSI Installer」の「Download」ボタンをクリック。
「No thanks, just start my download.」をクリック。
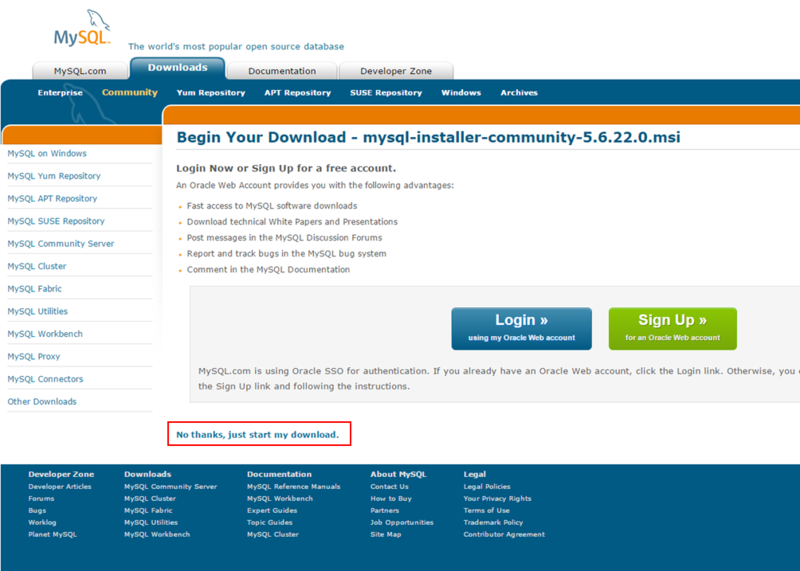
ファイルのダウンロードが開始されます。
2.MySQLインストールExeを実行。
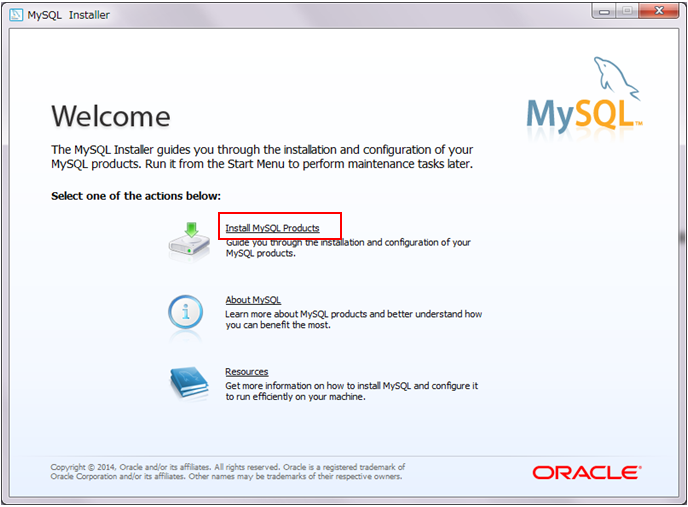
「mysql-installer-community-5.6.XX.0.msi」ファイルをクリックし、実行する。
3.「Install MySQL Products」をクリック。
4.「I accept the license terms」にチェックを入れて、「Next」ボタンをクリック。

5.「Skip the check fot updates」にチェックを入れて、「Next」ボタンをクリック。

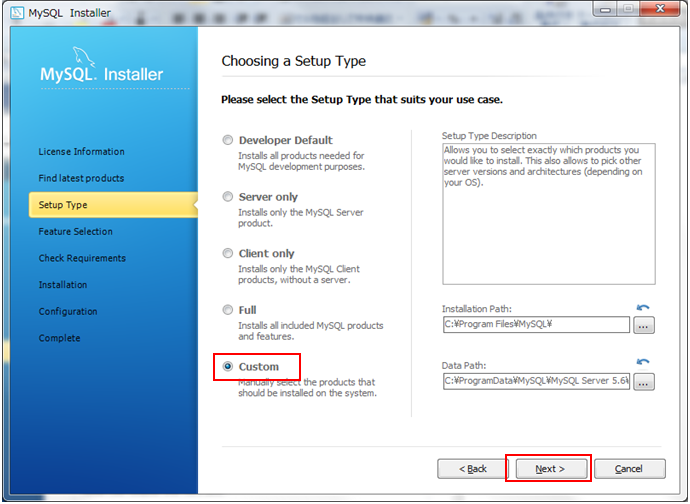
6.「Custom」にチェックを入れて、「Next」ボタンをクリック。
7.「Applications」を選択し、「MySQL Workbench CE 6.1.7」にのみチェックを入れる。(他にチェックがついている場合は外す)

8.「MySQL Connectors」を選択し、「Connector/J 5.1.31」にのみチェックを入れる。(他にチェックがついている場合は外す)

9.「Documentation」のチェックを外し、「Next」ボタンをクリック。
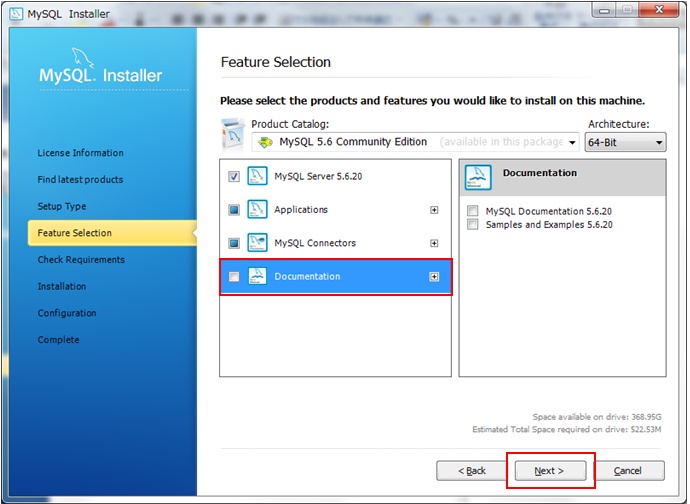
10.「Next」ボタンをクリック。
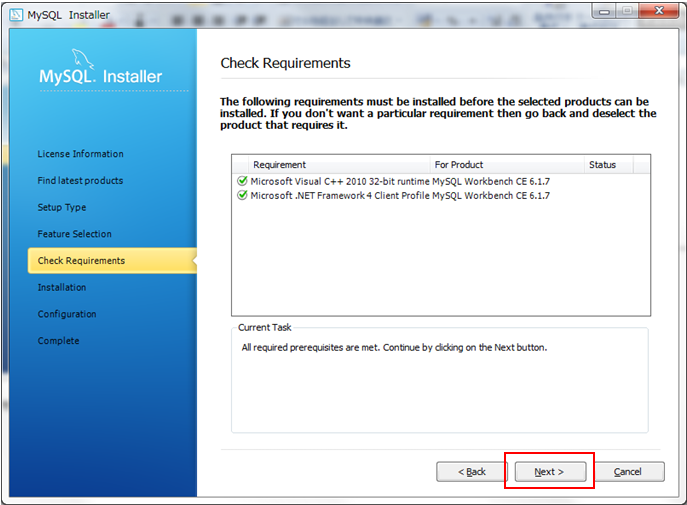
11.「Exexute」ボタンをクリック。
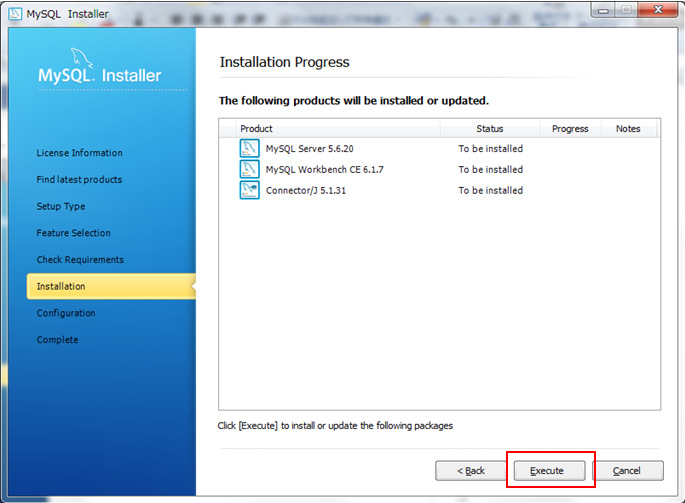
インストールが開始されます。
12.インストール完了後、「Next」ボタンをクリック。
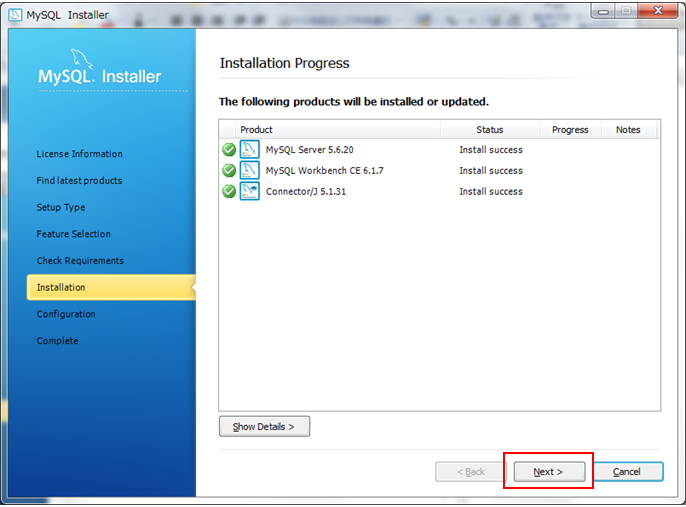
13.「Next」ボタンをクリック。

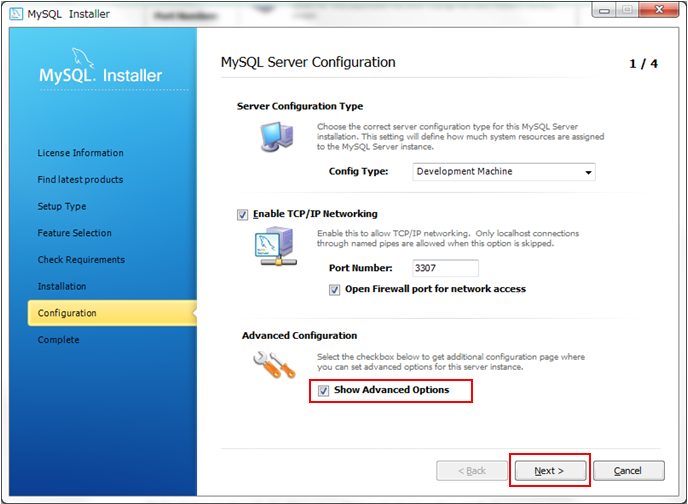
14.「Show Advanced Options」にチェックを入れて、「Next」ボタンをクリック。
15.「MySQL Root Password」と「Repeat Password」にRoot(管理者)のパスワードを入力し、「Next」ボタンをクリック。

16.「Next」ボタンをクリック。
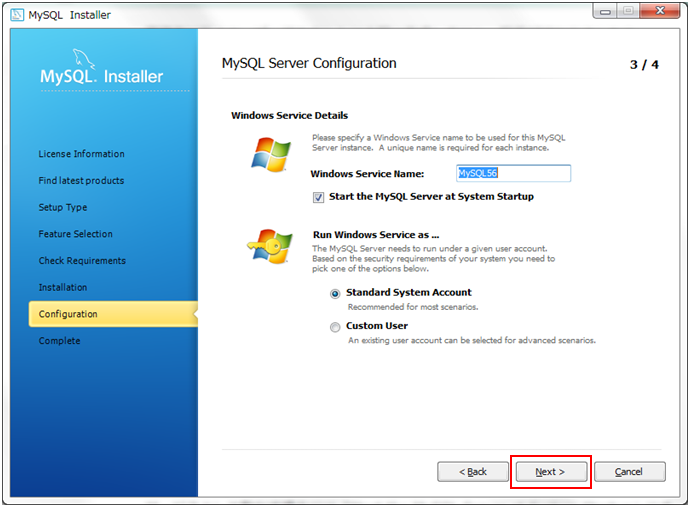
17.「Next」ボタンをクリック。
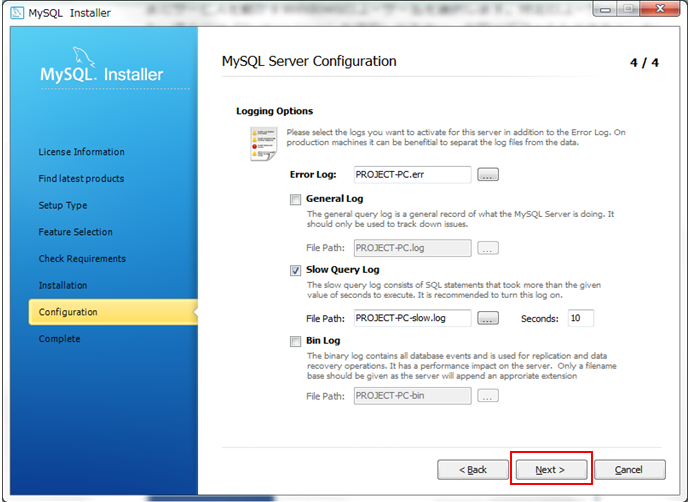
インストールが開始されます。
18.インストール完了後、「Next」ボタンをクリック。
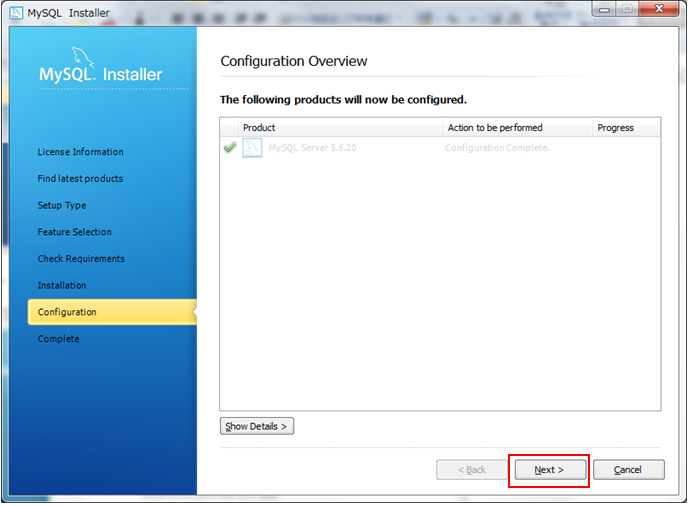
19.「Finish」ボタンをクリック。
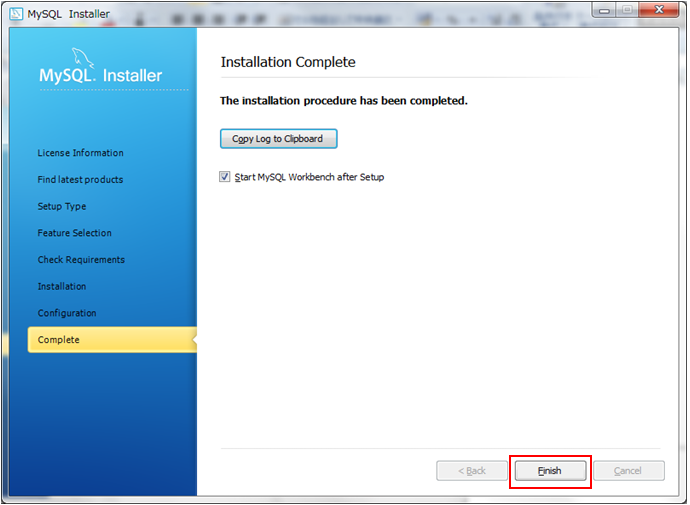
以上で、MySQLのインストールは完了です。
次回は
MySQLでサンプルデータベースを作成していきます。